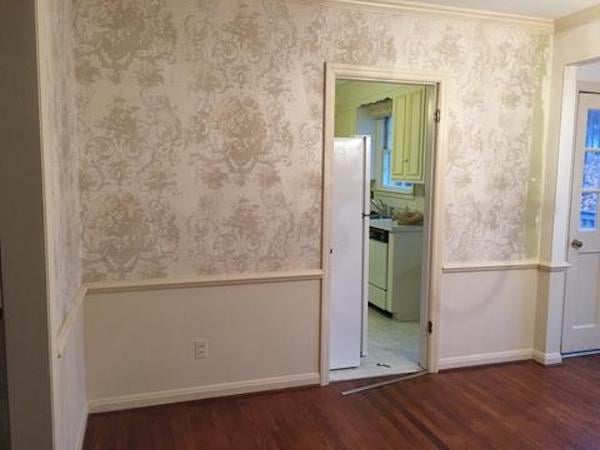
Nothing fills a professional wallpaper hanger’s heart with more dread than hearing a homeowner say, “my walls are already smooth and ready for paper.” Contrary to popular belief, most wallpaper actually magnifies, rather than hides, flaws in the walls. In fact, what might seem “smooth” to an untrained eye, will usually appear quite rough once the paper is hung and dry. Wallpaper prep, done correctly, is probably the single most important step when it comes to achieving a satisfying end product. And from a practical standpoint, wallpaper prep is the only way to ensure your wallpapering job is going to stick.
Prepping for Wallpaper Starts with Surface Repair
Your first wallpaper prep objective should be achieving as smooth a wall as possible. That means you’re going to need to repair any nicks, dents, holes, and scratches that have accumulated in your drywall or plaster over the years. Use a drywall compound if you have regular drywall, and a gypsum based filler to repair plaster walls. Apply the filler with a spatula, and then wait for it to dry before gently sanding it smooth. If you want to be thorough, apply a second layer of compound before sanding, since this material shrinks some as it dries.
Repairing Large Cracks and Fissures
Spot application of compounds and fillers with a spatula is fine for repairing smaller wall blemishes, but if you’ve got a larger crack or hole in the wall, you’ll need to do a little bit more while prepping for wallpaper. Remember, your wallpaper is going to shrink and pull on the wall as it dries. That being the case, simply filling large cracks and holes with compound isn’t going to cut it. Depending on the extent of the damage, you’ll need to apply some joint tape and then apply the compound or filler over that. And if you’ve got an actual hole, you’re going to need to install a larger drywall patch.
Smoothing Textured Walls
Besides repairing wall blemishes, you’ll also need to address any texturing your walls as part of your wallpaper prep. Whatever you do, don’t try sanding the texture down! Sanding down such a large surface usually results in an uneven wall, which is what you’re trying to avoid in the first place. Instead, you’ll want to apply a new layer of joint compound or finishing plaster over the surface, and cover up the texture instead. It’s a big job, and a tough one to get to turn out right. If you’re trying to remove (i.e. cover up) texture, it’s probably a good idea to call in a professional to do the job for you. This prepping for wallpaper step will take them a fraction of the time, and you’ll be much more pleased with the final results.
Clean Your Walls
The final step in wallpaper prep is cleaning the walls. Wipe down the walls with a vinegar solution to remove all dust and debris. This step is especially important if you’ve applied new compound or plaster. You’re going to have to remove the dust caused by all that sanding. Also, if you’ve got any large stains, take care of those as well. Just covering them up with wallpaper isn’t a good idea, since they are likely to work their way through the paper over time.
Ready to start your wallpaper project?
Find ProsTime to Paper
Once your walls are smoothed and cleaned, you’re ready to apply the paper. Be sure to follow installation guidelines carefully, or you’ll find yourself going through the entire process again before you know it. And if all this sounds a little overwhelming, don’t shy away from hiring a professional wallpaper hanger to do the work for you. A pro will do the entire job, from wallpaper prep on through to installation, leaving you the time you need to tack a few other chores off that to-do list.
 Decorative Moldings: The Perfect Cover-up
  Ceiling Mirrors – Considerations, Types & Options
  The Basics of Ceramic Wall Tile Installation
  Drop Ceilings
  Coffered Ceilings Add Value to Home

Are You Familiar With This Topic? Share Your Experience.