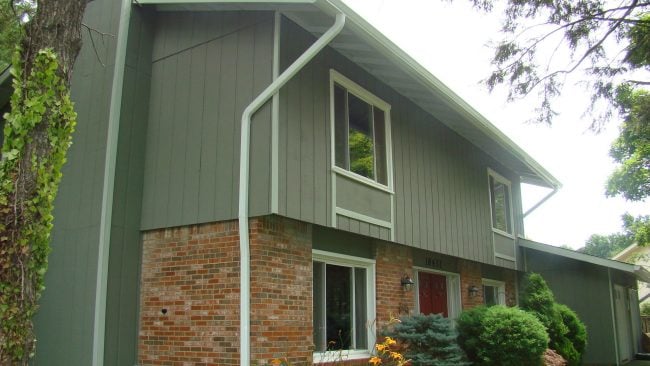
T1-11 siding is a wood or wood-based siding product that reached its height of popularity in the 60’s, 70’s and early 80’s, when a more natural, wood-grained look was all the rage. Its widespread use has dwindled as other siding materials, including steel, aluminum, composite and vinyl siding have taken over the market. It is still produced, however, and if you’re looking for a more natural product, T1-11 just might be just what you’ve been searching for.
Plywood vs. OSB
T1-11 siding comes in two major grades, plywood and OSB (or oriented stand board). The plywood product is a little more expensive but is far superior to the OSB variety because of its greater durability and expanded finishing options. Plywood T1-11, also known simply as plywood siding, can be stained if you’re looking for a natural wood look, or it can be primed and painted as well. On top of that, plywood siding can also be purchased in sanded or rough hewn varieties, although choosing between these two surfaces is purely an aesthetic choice.
Performance
Neither is better than the other when it comes to functionality. OSB products, on the other hand, are made of wood flakes, strands and water-treated with a binding resin and then sealed together using pressure and heat. While this product is relatively strong, inexpensive and widely used in home construction–OSB siding production has dominated the T1-11 market since its introduction in the late 1970s–it just doesn’t hold up as well as its plywood counterpart. This is primarily due to the fact that, because of the manufacturing process, OSB is subject to water damage over time, causing expansion, rot and general wear and tear.
Personalization
The other downside of OSB T1-11 is you can’t stain this siding. It must be primed and painted, taking away one of the primary reasons homeowners choose to go with this particular siding material. This isn’t to say that you should automatically shun the OSB variety, as it is certainly a proven and cost-effective siding solution. Compared to its plywood cousin though, it’s safe to say you get what you pay for.
General Maintenance and Upkeep
As with any wood siding, the trick to keeping your T1-11 siding in good condition, is diligent and regular maintenance. If you choose to stain your siding, this means re-applying a coat of protective stain every three to five years to protect it from the elements. If you choose to paint instead, you won’t have to attend to the siding nearly as often,probably every 10-15 years. If you do choose the painting option, it’s a good idea to paint the edges and joints prior to installation, as this can help to extend the life of your siding and prevent water damage. Repairing siding averages around $670 to $1,050 depending on how much of it needs improvement.
Best to Hire a Professional
Because proper installation is critical for ensuring that your T1-11 siding will last as long as possible, have an expert siding contractor perform the installation for you. Again, because T1-11 is susceptible to water damage over time, the best protection you can provide is to make sure it’s put on your house properly in the first place. Thus you can rest easy knowing your T1-11 siding will protect your home for many years to come.
 Popular Types of Siding for Your Home
  Vinyl Siding Cost Guide – Options, Installation & Extras
  Benefits of Pressure-Treated Wood
  Explore the Possibilities of Concrete Siding
  Are Brick and Stone Still the Ultimate in Exteriors?

Removing poorly installed T1-11 siding on a garage and replacing with new T1-11 siding correctly.
do you need to caulk where T1-11 meets your deck
I was told priming t1-11 siding with oil will void the warranty, and will cause it to mildew, what is the best primer and paint.
Greeatings,
I added 1500sq ft . Contractor choose T1-11. The contractor installed the siding and it was painted.The addition was 1987 and this pine siding was popular. After 5years the bottom was rotting and soft spots in other areas. My garage was clad in the same siding. I used 12in on center with 1x3in battens on the grooves to match the existing structure. The garage also rotted out. I removed the battens on damaged T1-11 and there was no primer or paint on the grooves and the lapping edges. The contractor installed the siding and then painted it.
I desided to replace the rotted siding myself. I primed the front surface and used deck sealer on the reverse. I primed and painted the mating edges, top and bottom. I painted these surfaces several times.
Her is what is happing:
Because the contractor does not pay attention to detail and did not paint these mating edges and rot takes place.
The rain runs down the siding and wicks up the unpainted bottom. The rain also seeps into the mating edges . One needs to caulk the matting edges. This siding is 4×8 verticle installed.The hating edges are 48in apart. If you need to use Z flashing between joints prime and paint all cuts. Leave 1/4 in gap between the Z flashing and the siding. A good practise is to coat the top, bottom and all cuts with caulk. Squeeze some on your finger and rub it on these joints. I can go on and on. I would like to share my construction pics and experiences on this subject with your readers.
I am a homeowner and am ending a small new construction project. My contractor installed T 111. It is fuzzy totally fuzzy. The painter said he could correct it by spraying and bankrolling. It is still fizzy. I have concerns that neither my contractor or painter may have caulked the grooves correctly and if I run my hand over the siding prior to painting I got a handful of sprinters.
AS a professional painter for 50 years I have found that T 1-11 needs a better than standard satin or semi gloss latex paint. Flat paint and stain does not do any good for the wood. It needs to be completely sealed to perform for years. Putting extra coats and back rolling will make the wood last for a decade. Paint or prime all cut edges when installing, caulk seams before painting, but don’t over do it on caulk. When returning to paint jobs a few years after application I found that it was the caulk that failed long before the paint job.