Installing ceramic wall tile is one home improvement that most homeowners are capable of tackling. In fact, it really isn’t much different than any other tile installation. It’s a basic procedure that includes putting up proper backing, mortaring the tile to the wall, letting it dry, and then applying the grout to the tile.
Choosing your Backing when Installing Ceramic Wall Tile
The first step when it comes to installing decorative wall tile is choosing the proper backing. Since ceramic wall tile is usually installed in areas where water is present, such as kitchens and baths, it’s important that you install it over a backerboard that is built to withstand exposure to water. Green drywall is the most common choice for areas that receive moderate exposure to moisture, though if you’re installing ceramic wall tile in a shower or as a backsplash, you should seriously consider cement fiber backerboard to do the job. Of course, if your wall tile is purely a decorative wall tile installation, like you might find in a living or dining room, common drywall will work as well.
Prepping the Tile Surface
Before you start your tile installation it’s important that you be sure to prep the surface. Make sure it’s clean and level to start with, and then lay out your tile pattern using a level to make sure the lines are straight and plumb. It’s also a good idea at this stage to dry set your tile to get an idea of how it’s going to line up at the edges. Ideally you should be left with the same size tile pieces at each edge of your wall tile installation, so you may need to adjust your tile pattern accordingly to accommodate that.
Ready to start your wall tiles?
Find ProsLaying the Tile
When it comes to actually laying the tile, you’ve reached the easy portion of the installation. You’ll need a thinset mortar and a notched trowel for starters. Apply the mortar in small sections with the smooth side first, then run over the mortar with the notched edge of the trowel to create a better surface for attaching the tile. After that, pay close attention to your tile pattern, and set the tiles in the mortar by working them firmly into the thinset. Once you’ve got the tiles set approximately where you want them, be sure to place tile spacers between the tiles so you get an even grout line when you get to that stage of the job.
Installing Ceramic Wall Tile: Grouting
After your tiles are all set and spaced, the next step is to sit back and let the mortar dry and set. Twenty-four hours is a good timeline to go by before you move on to grouting your new wall tile. Once things are ready to go, remove your tile spacers and use a rubber float to apply grout to the spaces in between the tile. Be sure you press in firmly and work the grout well into the spaces between the tile. Also, always keep a wet sponge or rag handy to wipe away excess grout and grout haze. If you’re installing grout in an area where exposure to water is commonplace, be sure your grout is of the waterproof variety and consider adding a little sand to the grout if your tile job has particularly wide grout lines. Other than that, all you’ve got to do is kick back, give the decorative wall tile installation time to dry again, and then go over it a final time to provide the finishing touches.
Ready to start your wall tiles?
Find ProsIf You’re in over your Head, Talk to a Tile Installer
While tile installation is within reach of most homeowners, it’s also a complicated process that has many potential pitfalls if you don’t know what you’re doing. If you’re unsure of your ability to perform this home improvement satisfactorily, there’s no shame in contacting a professional tile installer to do the job. The average cost will run you just a shade under $2,000, so you can decide what your time is worth. Whether you’re looking at a decorative wall tile installation or a more traditional ceramic wall tile installation in a bathroom or kitchen, a professional has the skills to the get the job done right the first time and without the risk of potential problems surfacing down the road.
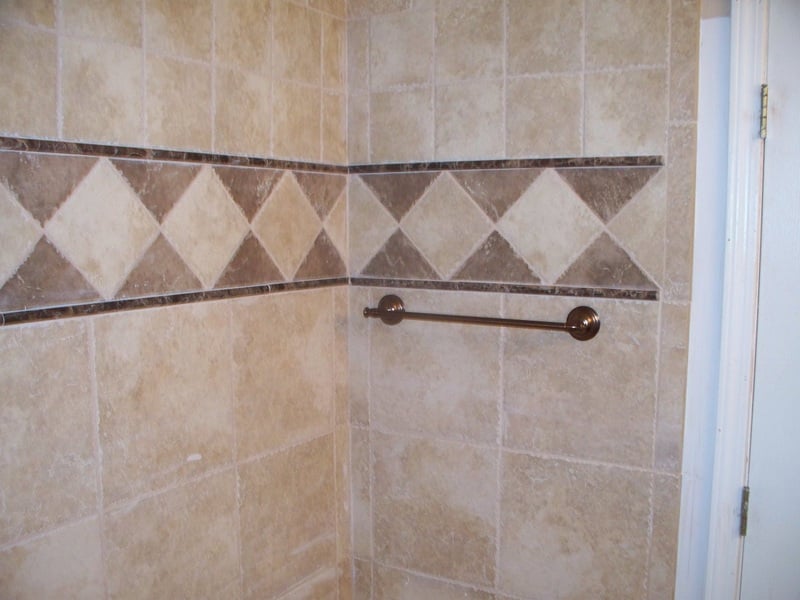
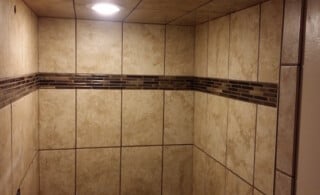 Ceramic Wall Tiles
  Decorative Moldings: The Perfect Cover-up
  Coffered Ceilings Add Value to Home
 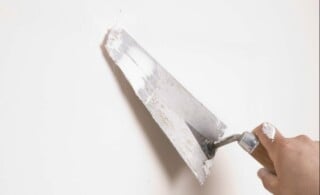 Drywall Finishing: Don’t Ruin the Ending!
  24 Famous Walls & Fences from Fiction

I had my shower enclosure done by a professional and am having problems. He used chicken wire and cement/mortar for backing. Not too long after the project was finished the tile started cracking at 10 to 12 locations. I put a straight edge on the tile and all three walls were bulging in the middle. I watched the contractor use a straight edge to screed the mortar so I know it was flat before he installed the tile. He said he doesn’t know why it’s bulged out afterwards at the and said he did nothing wrong. He thinks it is the fault of the tile. We used Nacare Blanco tile by Porcelanosa. Any thoughts on what went wrong here?
Hello Harry,
Sorry to hear that! First of all, the chicken wire and cement/mortar is a good method, if it is done correctly. A) Was their any plywood backing before he install the chicken wire and then mortar? B) How thick was his mortar? Standard thickness no less than 1 1/2″ to 2″.
Here are my steps to a successful shower wall mud float method . ( the 2 coats mud float for walls )
1) plywood board over studs
2) staple the felt paper (15 lb) to plywood board
3) metal lathe wire or chicken wire
4) apply a scratch coat ( mud thickness 3/8″ – 1/2″ ) and using a scratch coat comb,then allowing the scratch coat to dry for 24 hrs
5) then apply the 2nd coat mud floating over the scratch coat ( but spray water over the dry scratch coat before you apply the 2nd coat of mud ( thickness is 1 1/2″ )
***** Total thickness of mud is 2″ . The wall will be solid.
I believe that your wall is bulging like that and cracking in many spots is, because maybe there is no plywood board on the studs and possibly the thickness of the mud float wall is not thick enough. If the mud is 1″ thick and no solid backing, and the chicken wire could be moving a litte. That’s my take on it. I been doing custom mud floating project , shower walls and tubs, hot tubs and jaccuzzi’s, roman bath tubs, countertops, steam rooms, floors. Custom house ( Mansions) and big commercial projects. I’ve been doing it for 39 years.
Hope this information helps! Good luck!
In my opinion it’s a combination of mortar shrinkage and no solid backing obviously it was definitely improper installation I’m very sorry you have this disaster on your hands
THANK YOU
JOHN GREGORY